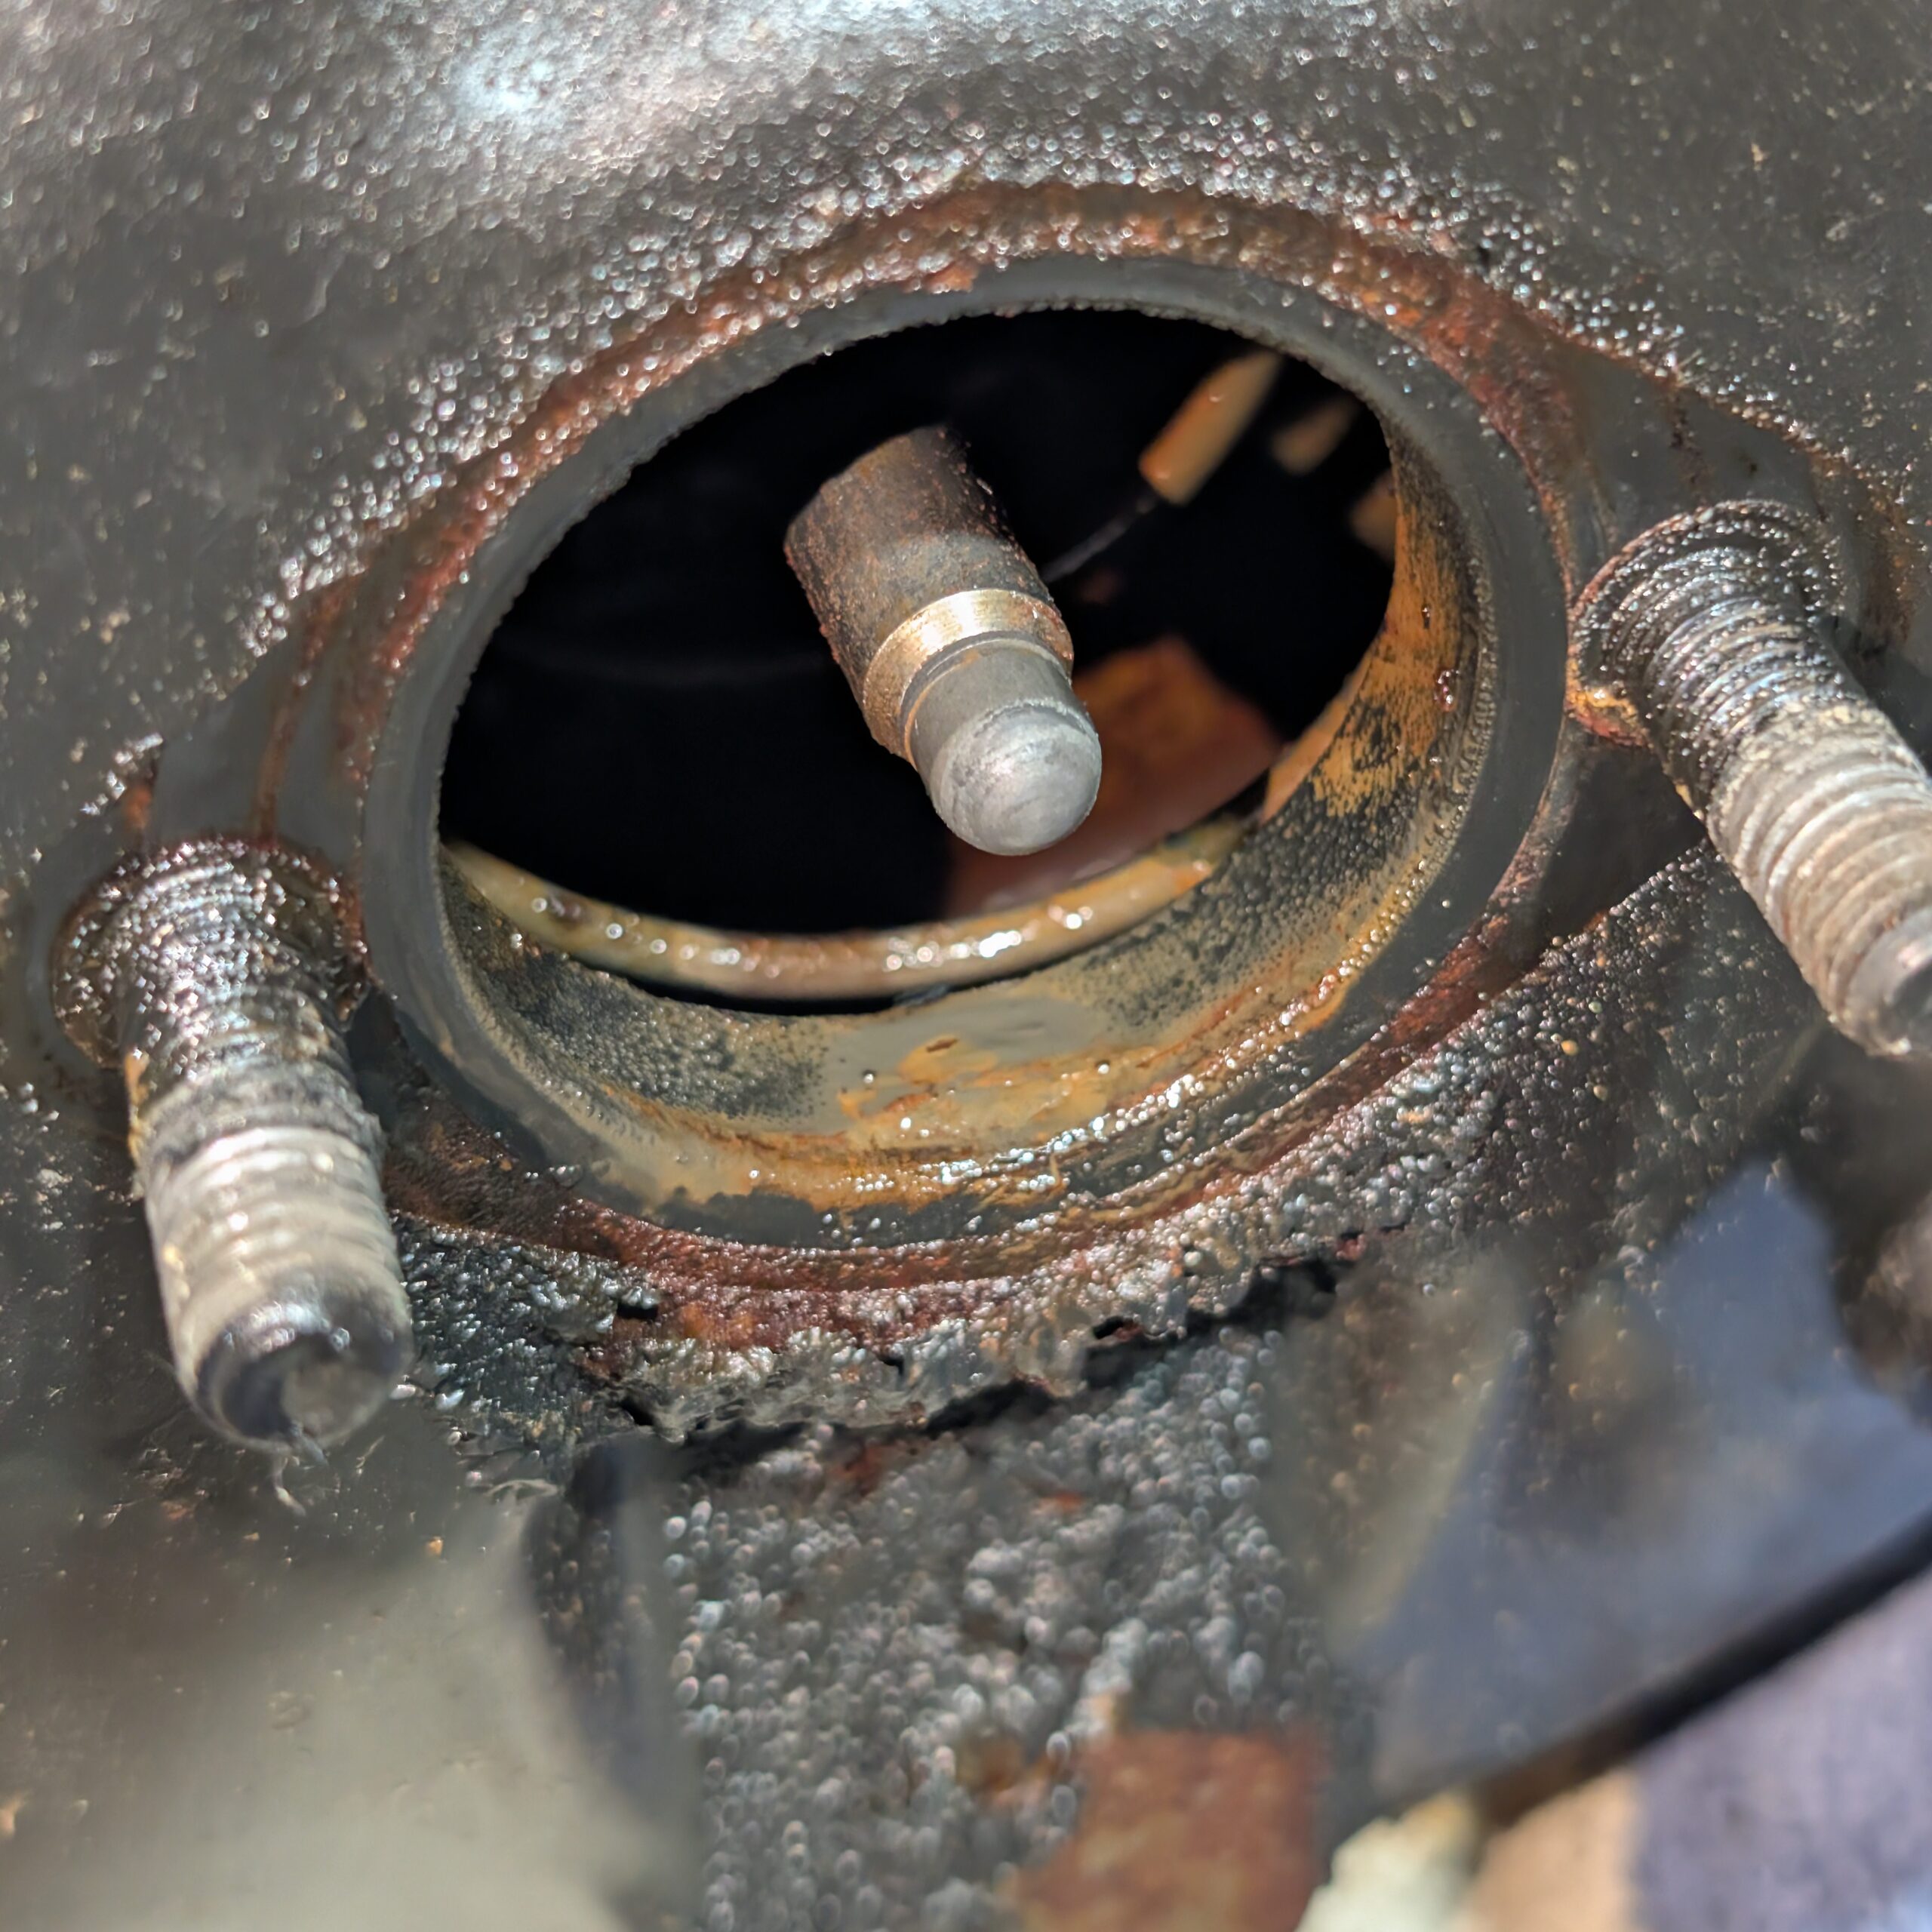
I recently made the discovery that the master cylinder on my 911 Carrera 3.2 was leaking brake fluid into the brake booster and had destroyed the seals from within. There was so much brake fluid in the booster that it had been making it into the engine through the vacuum line.
I had never been impressed with the feel of the stock braking system. After my first few weeks with the car I assumed that it was a non-boosted system due to the pedal stiffness. Not only was the pedal stiff but it took a good amount of travel to get stiff and build pressure. Stop and go traffic always felt like a leg workout not in force but in distance. During my years of ownership before the master started leaking I had rebuilt all four calipers and replaced the pads and rotors, so I knew the system was well bled and working as intended past the master. Perhaps the master was leaking internally the whole time and/or the booster seals were letting air in from the beginning, but seeing replacement costs of $2-3000 for OE/OEM parts was the final straw to try something different.
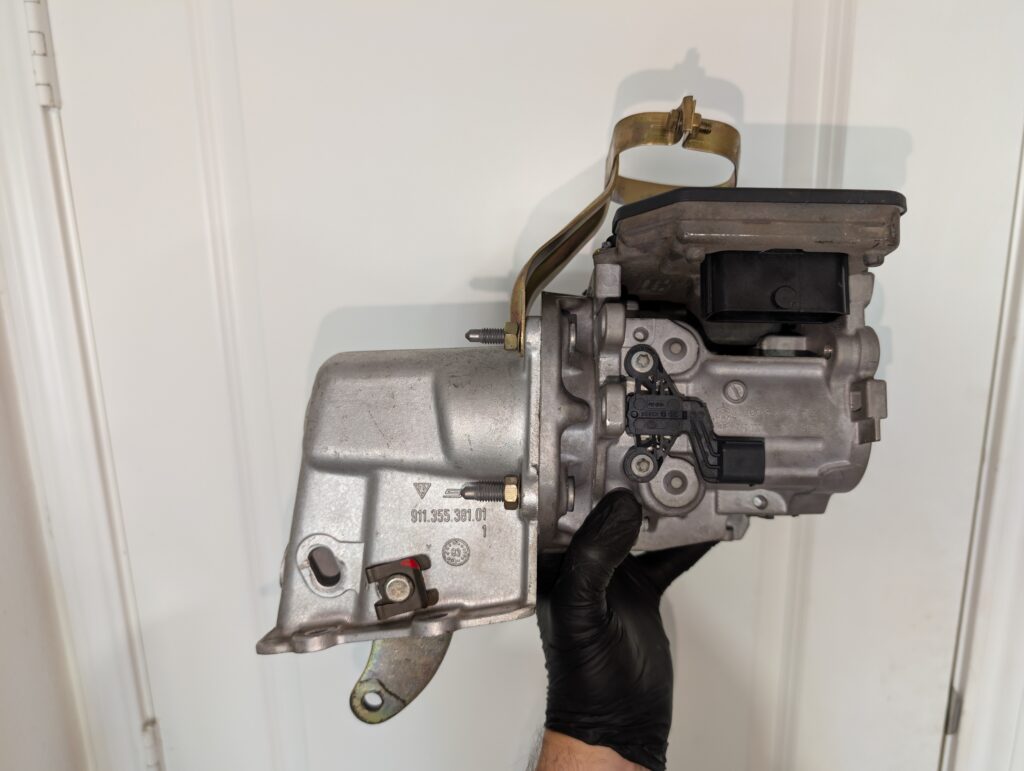
The Bosch iBooster had always interested me in the past. It is an electric brake booster most commonly associated as being used in Teslas (thought it is used in many more makes as of late). Because it is electric, it can generate full braking assist with the engine off, and unlike electric vacuum pump based boosters it should in theory be quiet and not felt through the pedal. The iBooster’s controller has two CAN busses that can be used to get data and/or control some functionality of the booster, but some model iBoosters do not need any CAN connection or external feedback to operate in failsafe mode. All required sensors are self contained. There are two generations of iBooster currently available, Gen 1 and Gen 2. Gen 1s are a bit more expensive but have some features that make them more convenient to retrofit (such as the mounting system).
First up was a sanity check. Would it even come close to fitting in the chassis? Thankfully, there is plenty of information on the iBoosters out there since they are somewhat commonly used in EV swaps and other retrofits. I found flange mounting drawings on EVCreate and whole CAD models from SGH Innovations
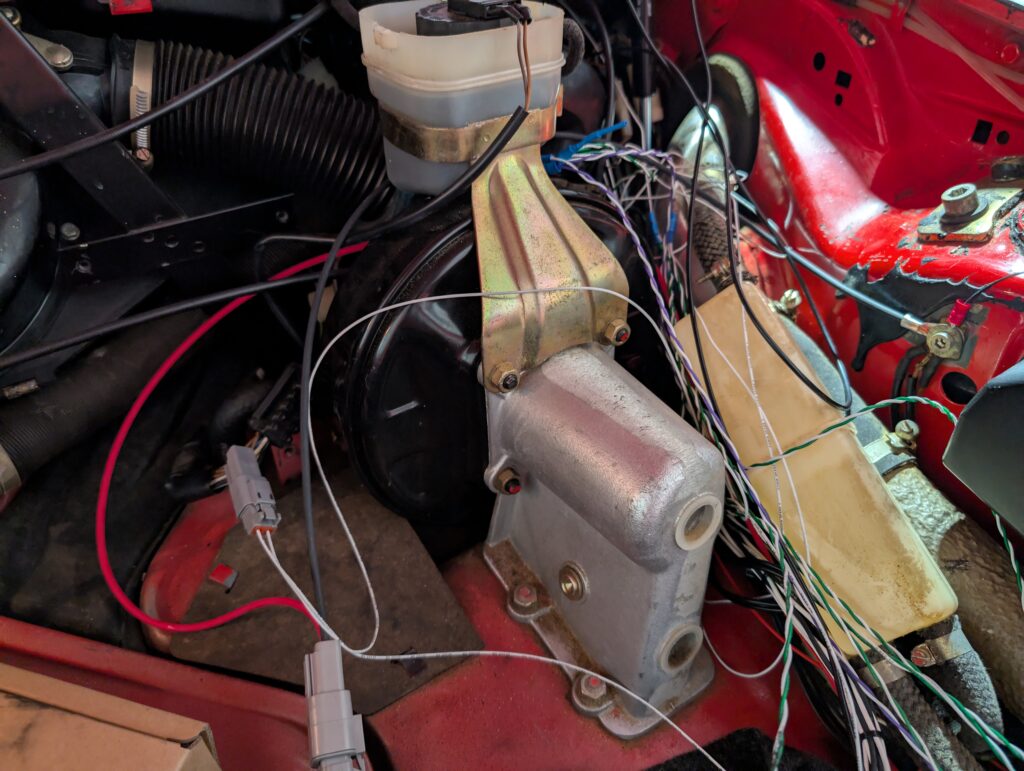
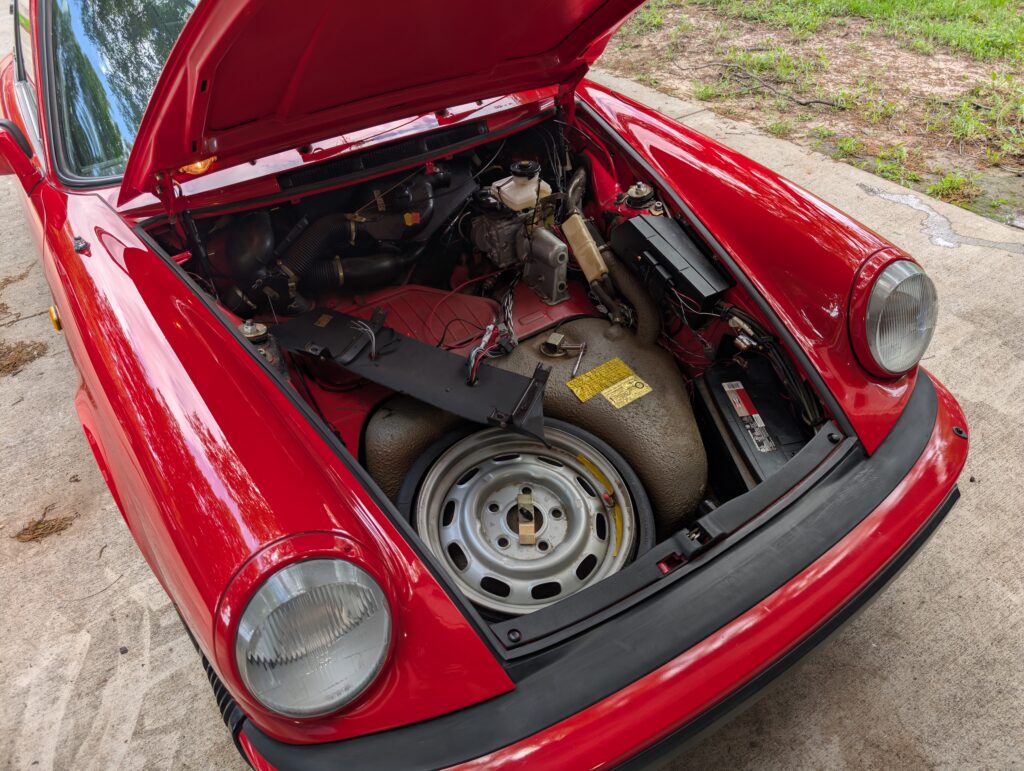
For those not familiar with the air-cooled 911, the booster and master setup are a bit unique. The booster is mounted backwards and the master faces the driver.
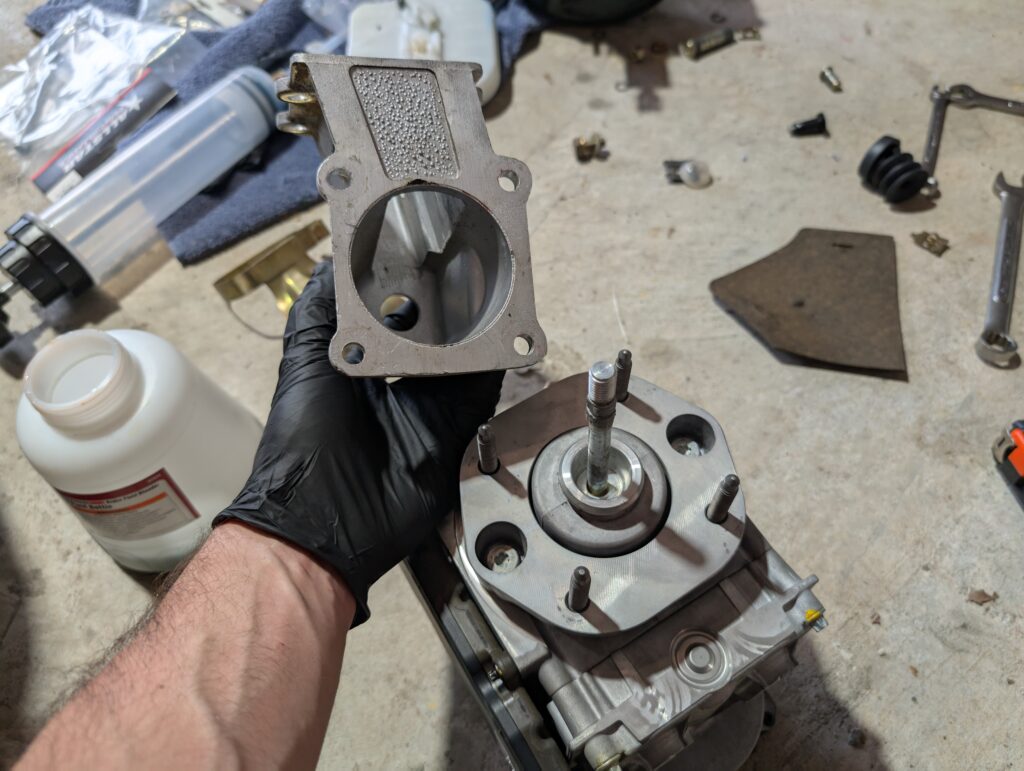
I removed the original booster and its mounting bracket to measure the bolt size and pattern. Incredibly, it matched up exactly with the Gen 1 iBooster bolt pattern of M8 bolts in a 72mm square. The Gen 1 iBooster has a removable mounting flange which makes it easy to adapt to custom applications, the Gen 2 does not. There are multiple Gen 2 mounting options but none with square bolt patterns, so sticking with the Gen 1 was obviously the move if I was to proceed.
I decided to go ahead and give the swap a shot. The goal of this initial swap was purely to prove the concept of the iBooster being a viable option for a brake booster alternative for the air-cooled Porsches, specifically the 911 Carrera 3.2. My goal was to swap this booster in with no custom fabrication if possible and to do it using as many off-the-shelf parts as I could to minimize investment. Many of the choices I make going forward in this post are due to that, and if the swap ends up working long-term I will 100% go in and re-do some things in a more proper manner. That aside – let’s get started.
Physical Mounting
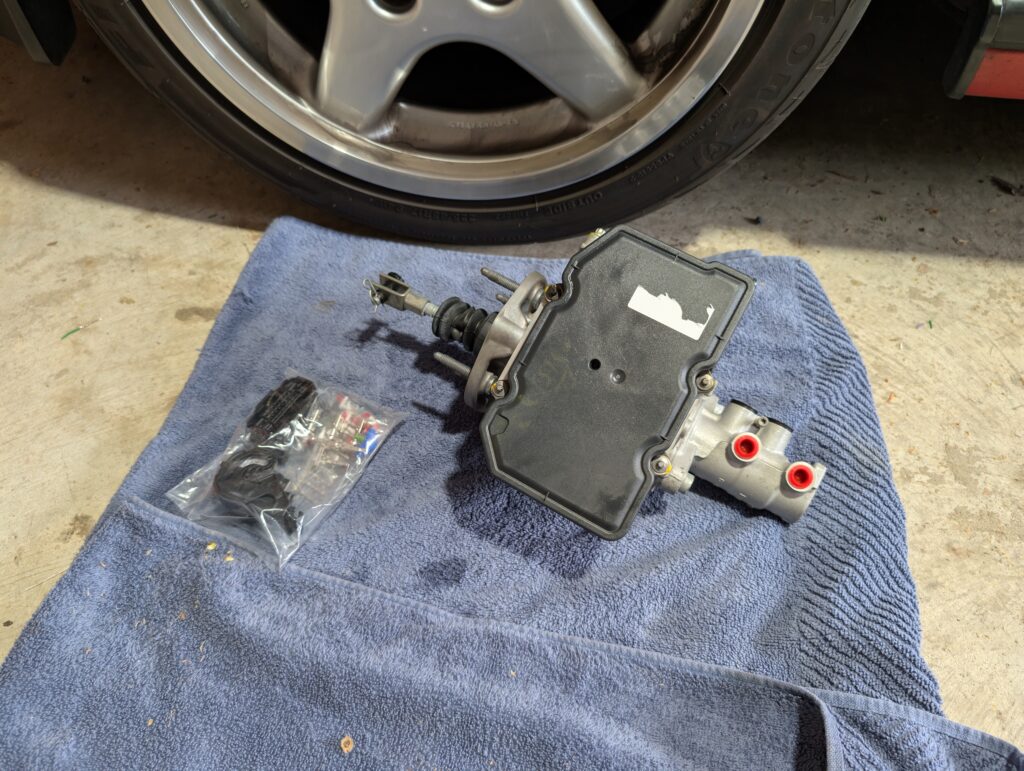
iBoosters are surprisingly cheap. I was able to find a Tesla Gen 1 iBooster on eBay shipped with its master cylinder for under $300.
As expected, the iBooster flange fit perfectly into the Porsche booster mounting bracket.
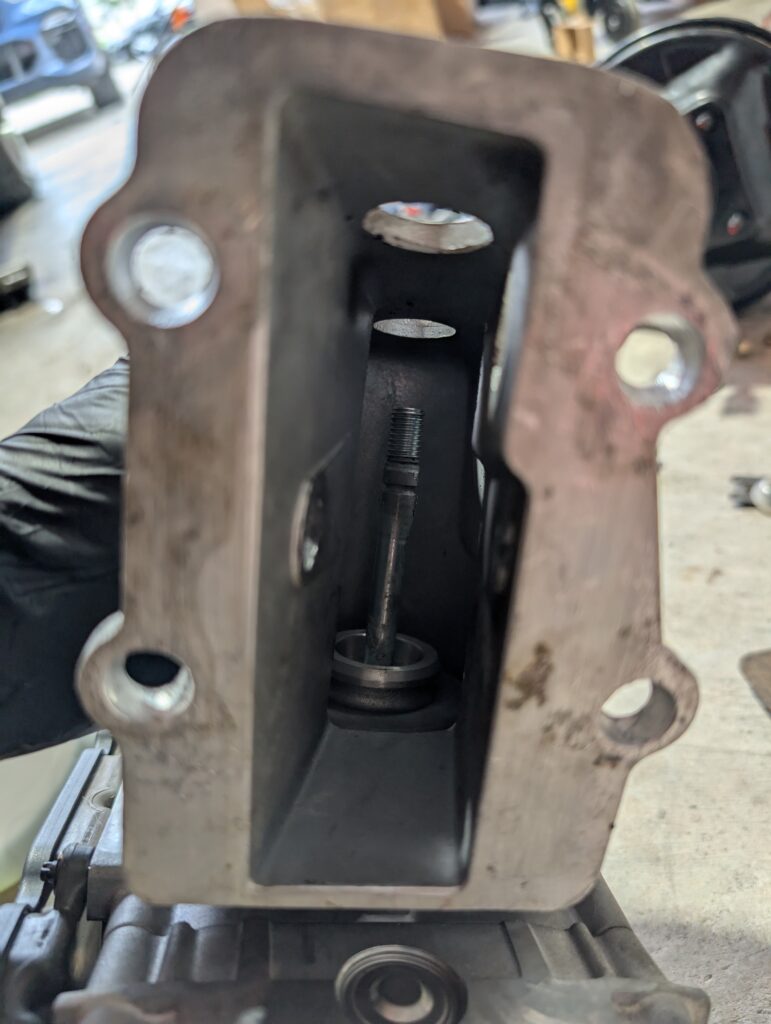
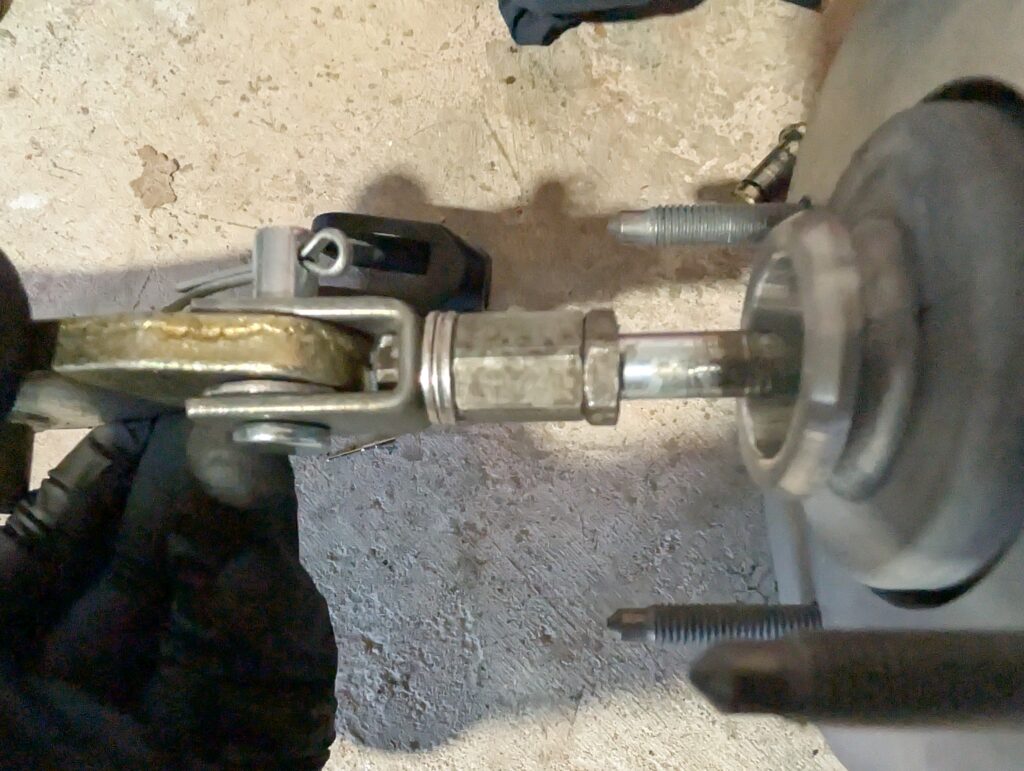
This revealed the first issue. The Porsche booster has a very short pushrod compared to most brake boosters I am used to as well as the iBooster. The iBooster pushrod and clevis were much too long to work unmodified in the original mounting bracket.
I am a 30 minute drive away from the Summit Racing showroom, so I decided to order the only three random clevises they had in stock to see if I could make them work somehow.
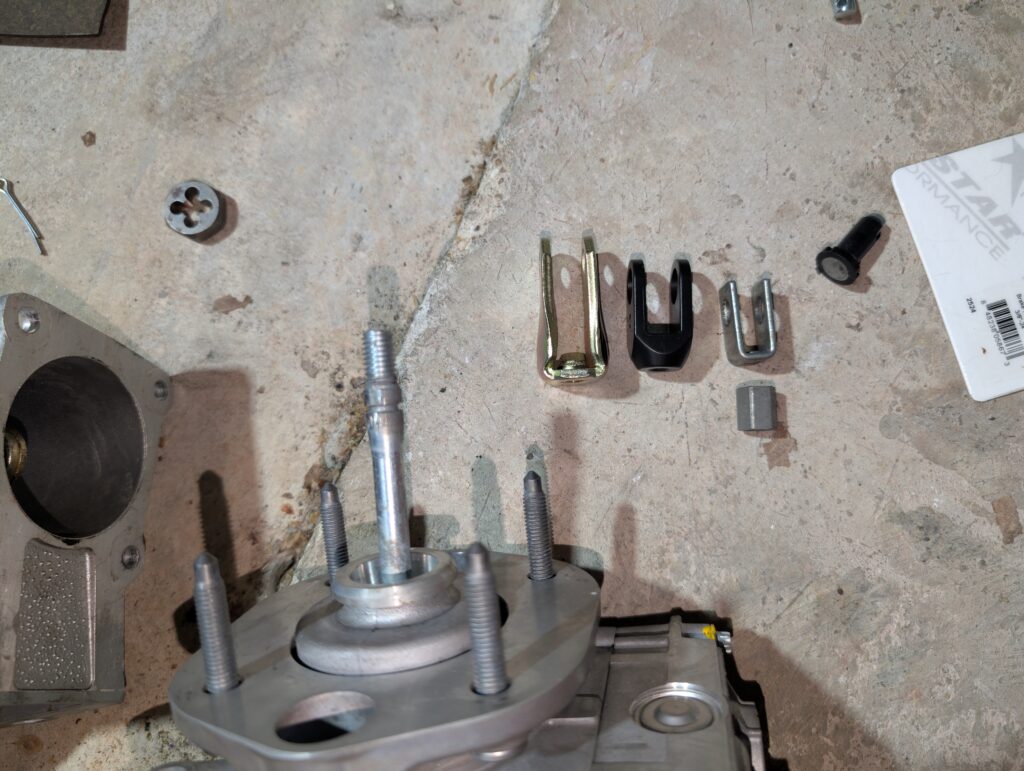
Unfortunately, I wound up shearing the stock iBooster clevis in half trying to remove it. With everything in hand, I took many measurements and produced this lovely graphic to share with some friends for brainstorming.
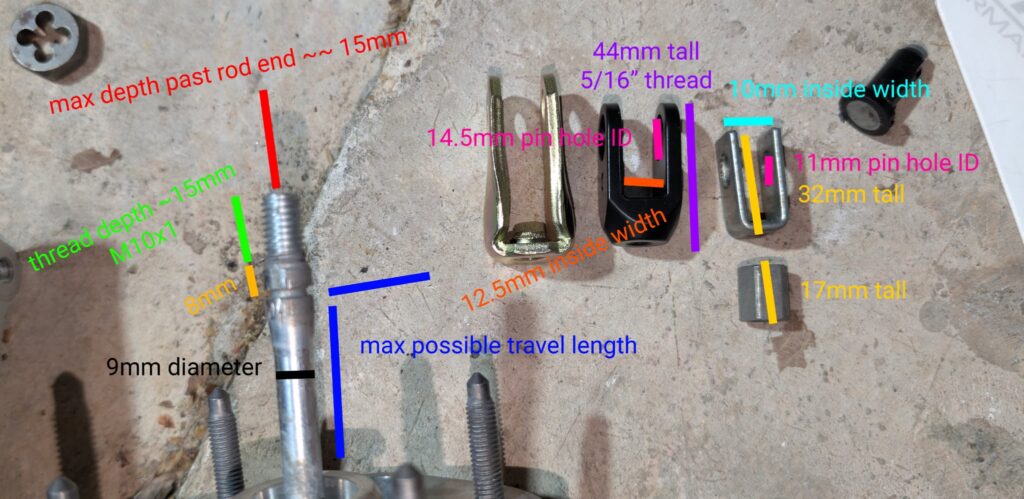
To make a long story short – none of the clevises I could get my hands on in a reasonable amount of time would work for various reasons. The “inlet” of the brake booster where the pushrod enters is narrow – and it was clear that at full compression only the original clevis was small enough to clear the sides and enter the body of the booster.
Even though the 9mm diameter pushrod base was too small to officially cut the 10mm thread the original Clevis used, I decided to give cutting down the pushrod and threading it a shot. If that did not work – I would have a new threaded rod welded onto the pushrod. Luckily – it worked. With a jam nut against the clevis it was very secure – secure enough to continue testing. The top of the clevis needed a bit of modification as well and I used a bolt and some washers to space out the clevis components.
With the booster able to mount to the bracket and have a connected linkage, I proceeded to install the bracket back into the chassis and begin to test fit the booster itself into the body.
Most vehicles that use the iBooster orient it so that the ECU is on either side of the booster. Unfortunately for me, there was just no way to make that work without modifying the body. The booster did fit by orienting the ECU on the top however.
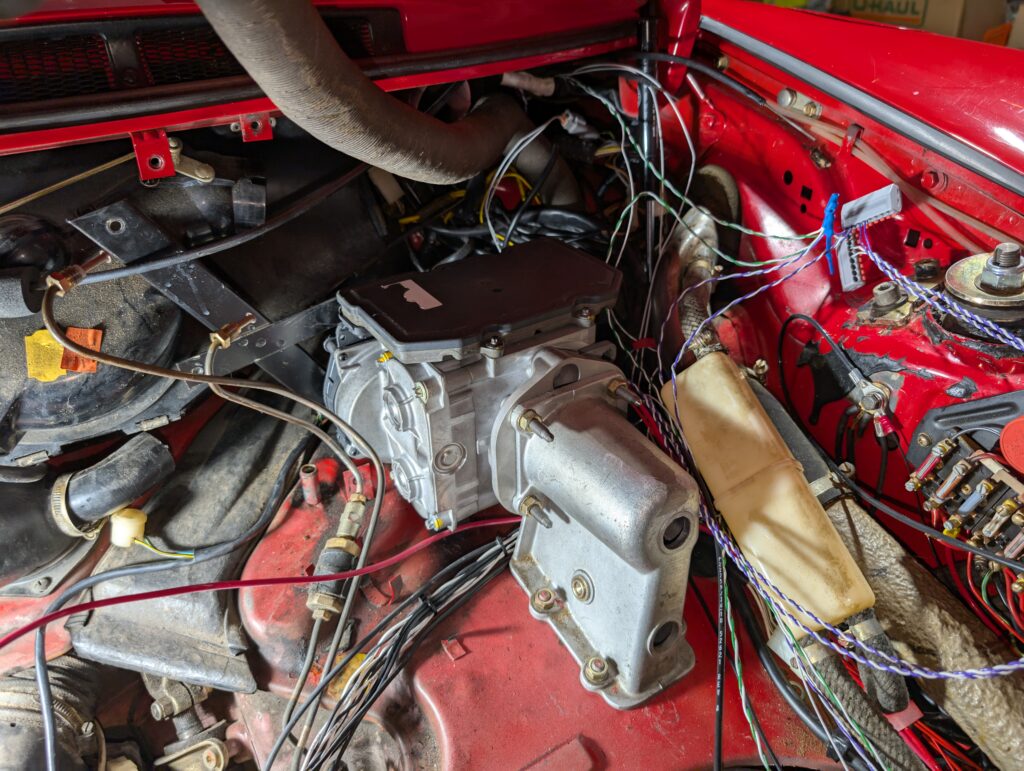
This has the consequence of the master cylinder being oriented so that the fill ports are on the side of the master. A bit of research turned up a single vehicle that oriented the iBooster in this way – the Chevy Bolt. Chevy Bolt brake masters were available on eBay – so the option was viable.
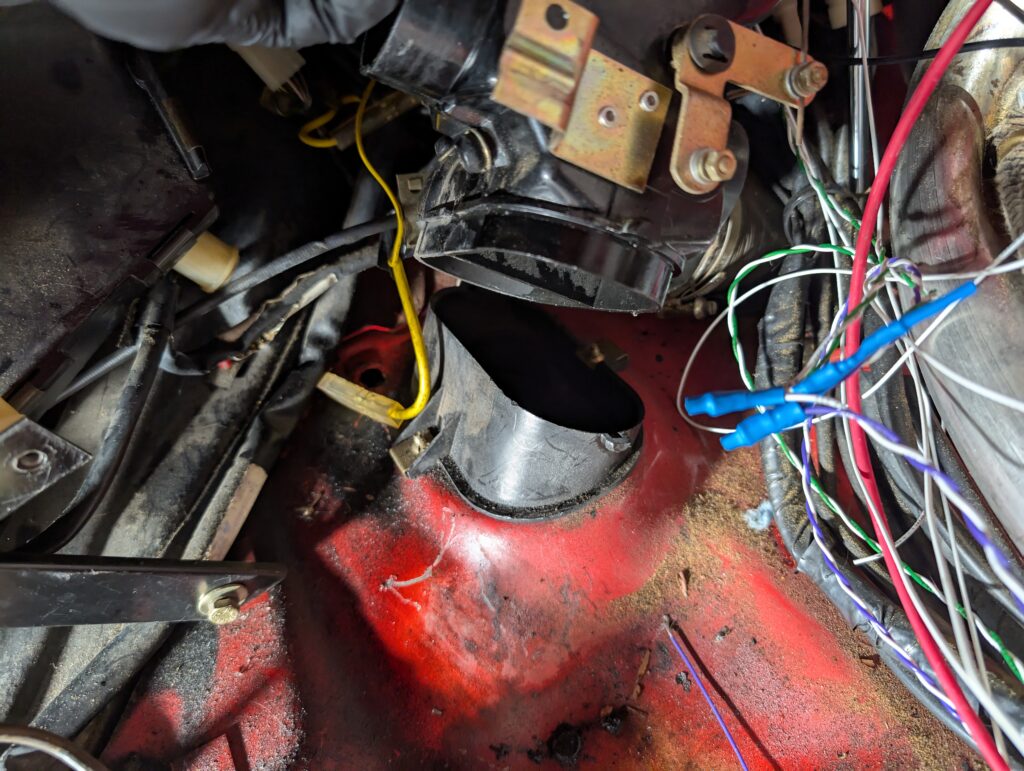
For the iBooster to fit in this orientation, I had to disconnect the heater duct/door box on the drivers side. For this to be a permanent solution I will have to design a slightly modified base to connect to the body and push the junction over a few mm. With the Texas summer approaching having working heat is not an issue – but it definitely appears that this will be addressable quite easily.
Hydraulics
The Chevy Bolt master arrived and fit perfectly.

Since the master is tucked away near the frunk firewall, a remote reservoir is definitely needed. Some research turned up that certain model Honda Accords have a Bosch master with the same fill ports and a remote reservoir. I hacked up the factory reservoir bracket and zip tied an Accord reservoir from eBay to it.
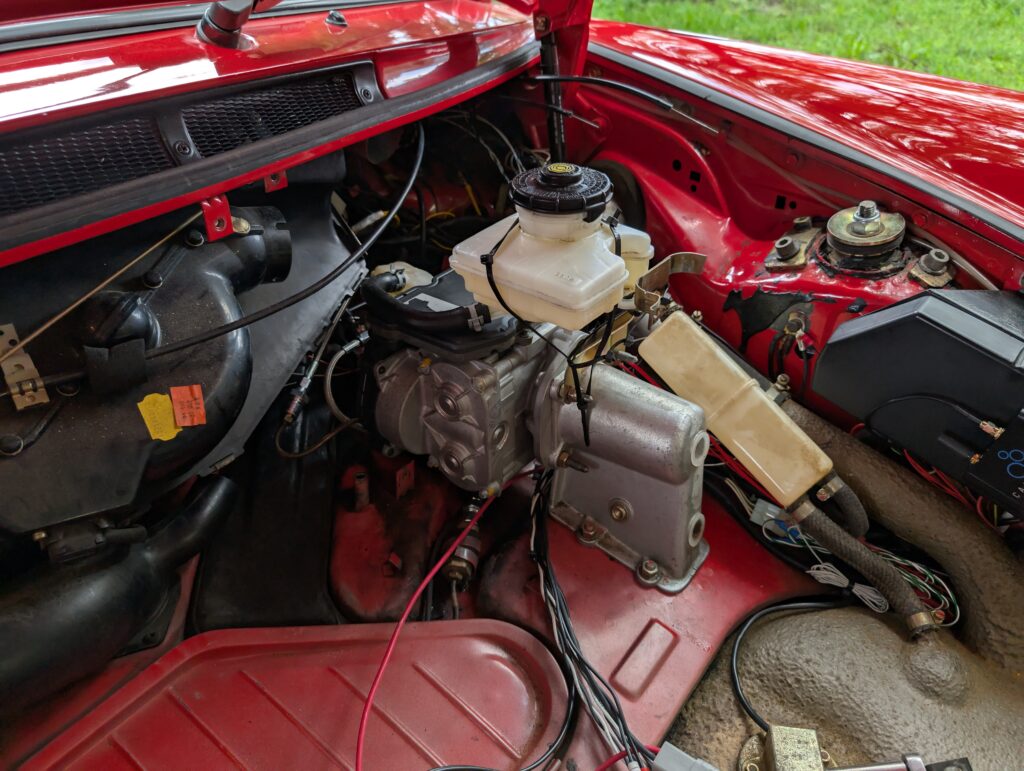
This should be a quick SendCutSend order away from being permanent. But with the zip tie method fluid freely flowed from the top reservoir to the lower and nothing moved around so it was good enough to continue testing.
Next it was time to plumb the system. The Porsche brake hard lines use M10x1.0 bubble flared ends. The Bosch master from the Tesla iBooster used an M12x1.0 inverted flare fitting. My initial goal was to go to a 3AN intermediary in case I needed to retain the factory brake pressure switches to control the brake lights. The 3AN would allow easy adaptation to any size I needed for this initial testing. Unfortunately, the Chevy Bolt master appeared to use an M12x1.5 thread pitch which seems to be exotic in the world of brake fittings. I was not able to find an M12x1.5 inverted flare fitting anywhere with a quick shipping window or for local pickup. The first set of fittings I ordered showed up and were clearly not connect. The flare was very deep and would obviously not seal. I ordered another set of fittings and they showed up the same way. I knew I had an issue.
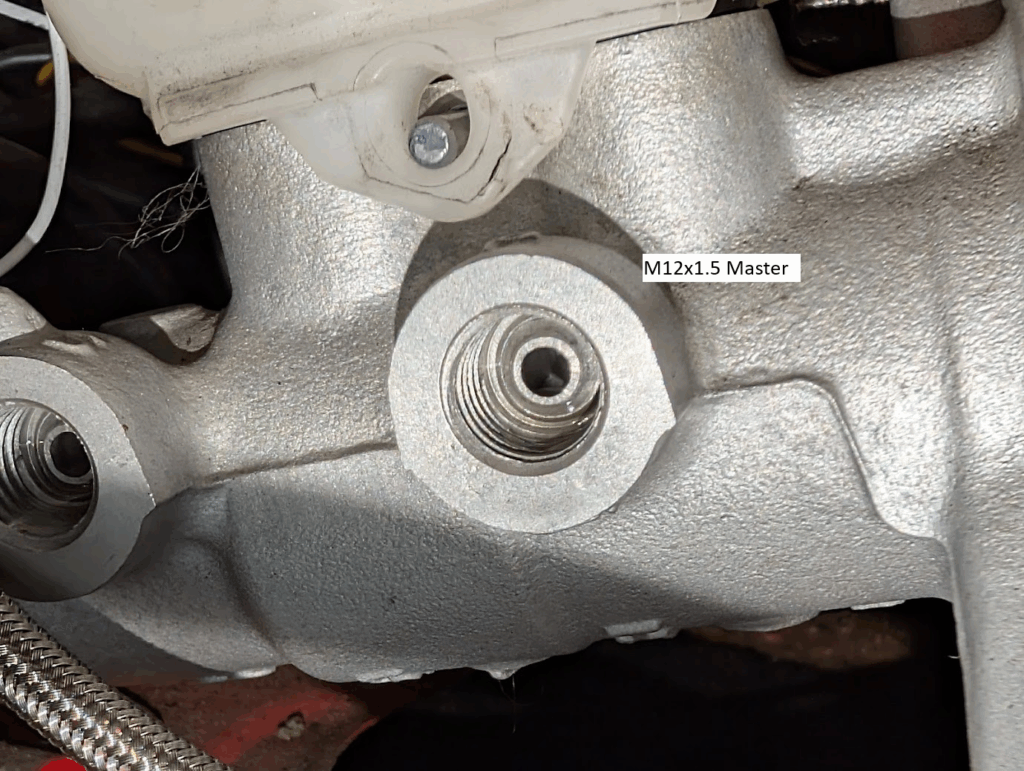
In the end, I ended up ordering three different sets of “M12x1.5 inverted flare to 3AN” fittings, and all came looking the same way and would not seal. Above I have pictured both masters which clearly have the same inverted flare, and then the M12x1.0 inverted flare fittings and M12x1.5 inverted flare fittings I was receiving. It is clear the M12x1.0 fitting has the correct flare, but something is not right about the M12x1.5s. Two of the websites I ordered the M12x1.5 inverted flare fittings from specifically had them listed as “brake system fittings” and mentioned brakes in the description – yet they clearly were not right.
I received some tips online that maybe the flare was just too deep and I had to cut it down. I attempted to Dremel and file flat three of the adapters in small increments until the flare barely existed – and it never sealed in any of those attempts.
I don’t know why I could not get the right flare when the right flare seemed to exist for the M12x1.0 – but in the end I ended up seeing if banjo fittings would seal against the master. Luckily they did.
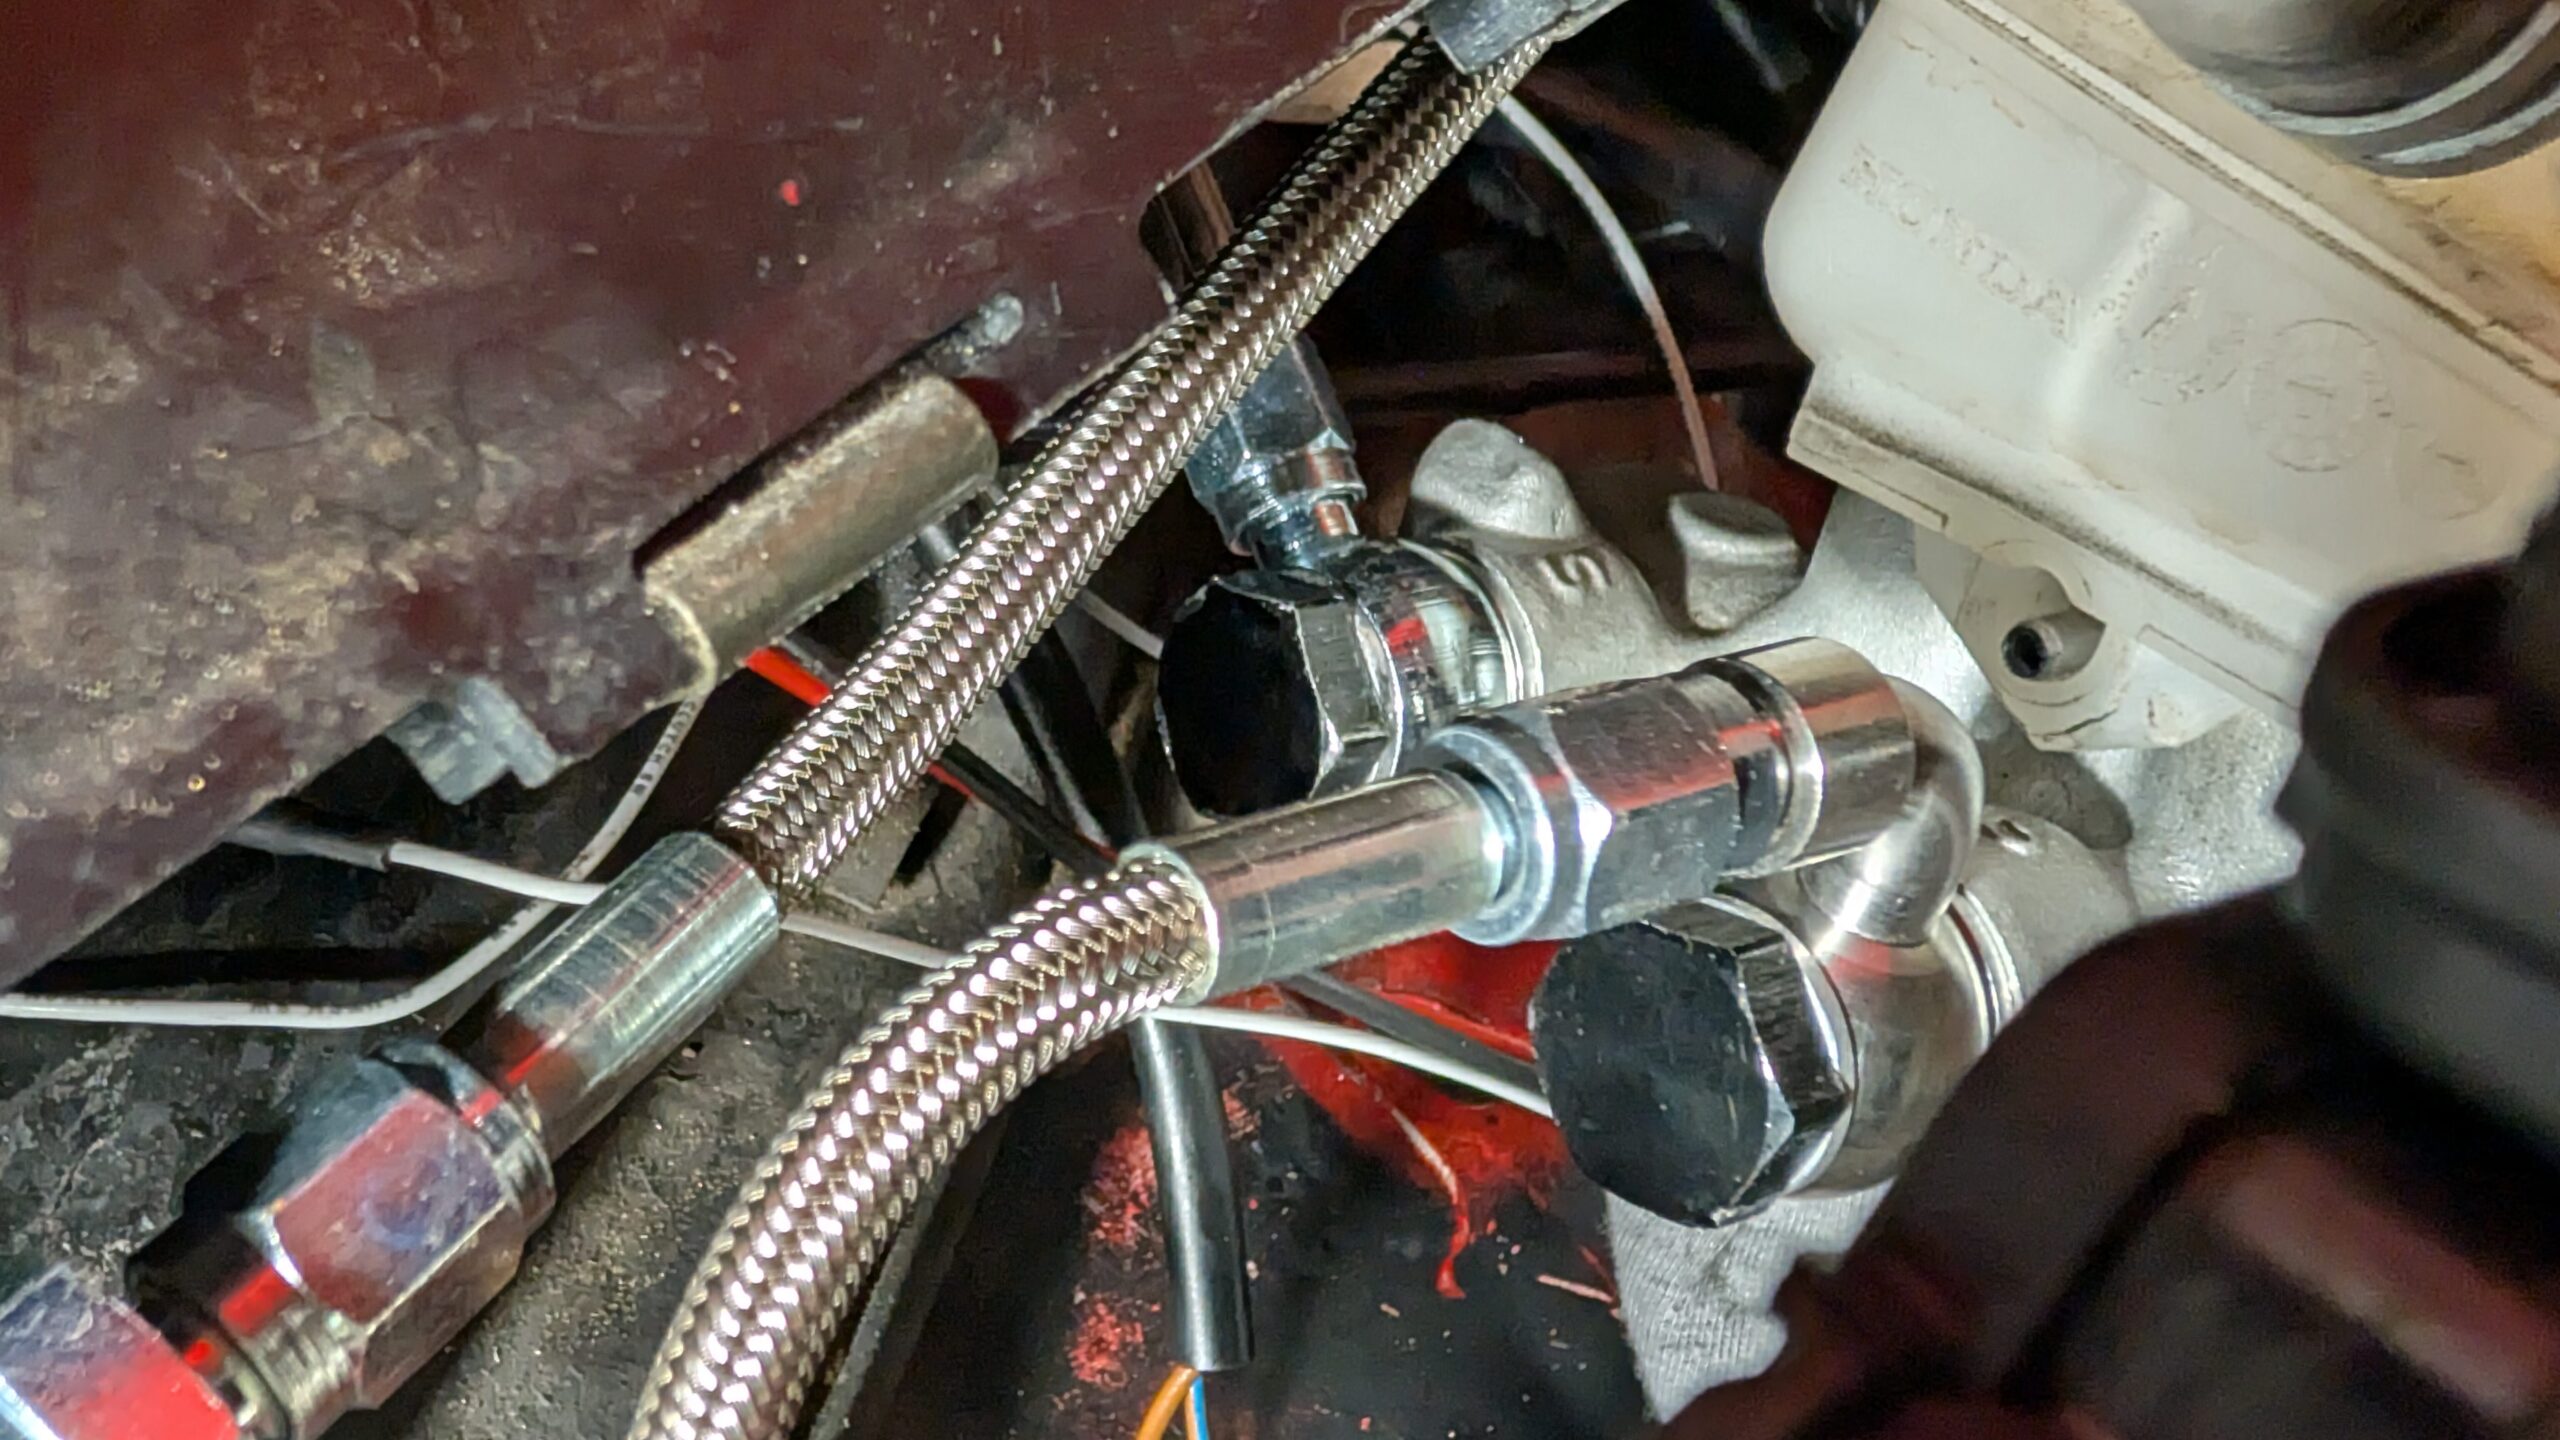
While it is only recommended to use banjo fittings on properly machined and prepared surfaces – it seems this master cylinder has its outlet port faces machined enough to seal properly.
After I am finished testing I plan on having custom fittings made to go from the proper M12x1.5 inverted flare fitting to the M10x1.0 bubble flare directly and cut the AN portion at all for a safer lower component swap.
With the brakes bled – that closed off the hydraulic portion of the swap and only left electrical.
Electrical
The resources I linked earlier have plenty of information on the pinout, connector, and contacts used to power and wire the iBooster so I will not go into those details here. To make things simple, I purchased a connector and contact kit from Tulay’s Wire Werks.
Naturally, I whipped up a flying lead project in our Wiring Project Manager which can be found here: 911 3.2 ibooster (gen 1) wiring
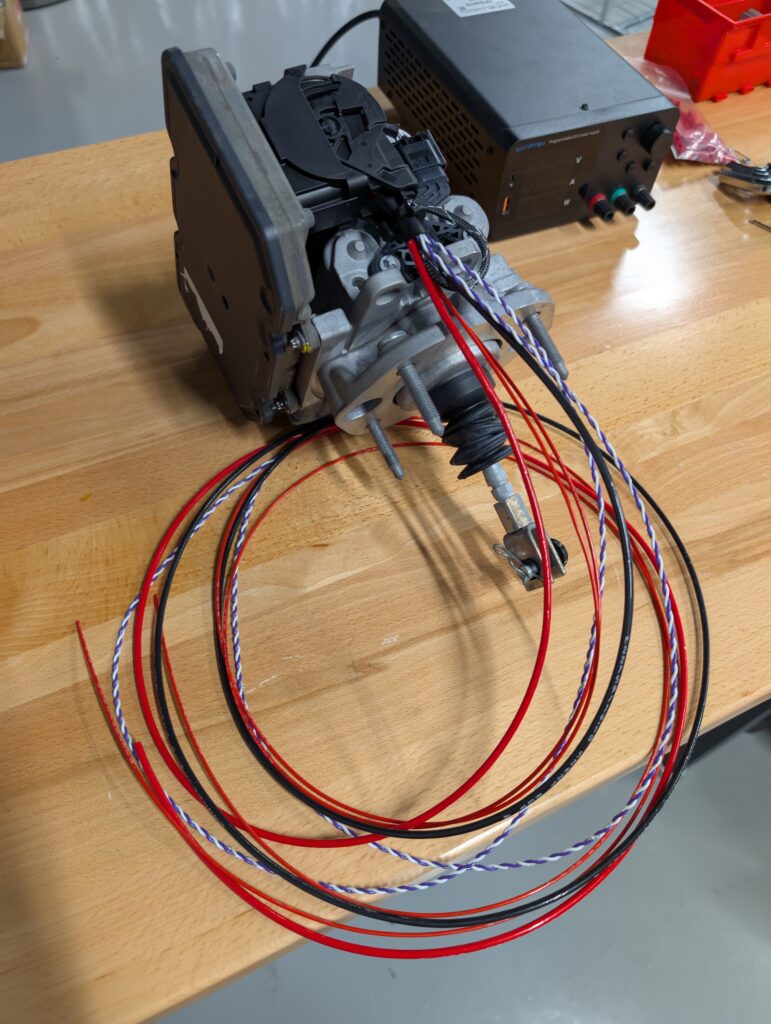
The wiring is not complicated – especially if you will not be using the CAN bus. I wanted access to both CAN busses so included wiring for that.
Once powered up, the brake booster worked immediately. I programmed the CAN definition into my ECU and tested the data stream from the booster.
To control the brake lights, I ended up skipping out on the pressure sensors for now and instead am having my ECU turn on a relay when the iBooster tells it the pedal has been actuated.
Final Thoughts
I have driven the car for about a week now with the iBooster and Chevy Bolt master installed. I am truly blown away by how much assist power the iBooster can generate! With the current master cylinder installed – it is far too much though. The factory master cylinder has a bore of 21mm, and it is common upgrade with bigger brakes to go to the 930 Turbo 23mm master cylinder. The master cylinder from the chevy bolt is likely a 1″ bore (like the Tesla Bosch masters) – so almost 18% larger! This plus the increased assist makes the brakes super touchy and super grabby. It is so aggressive that hitting bumps in the road while braking can nearly send me into the steering wheel.
The fix should be simple, find a different brake master (or get bigger brakes 😉). Even if I can not find a master cylinder oriented properly and designed for the iBooster, it should not be hard to find a master to make an adapter for. I really like how short these modern Bosch masters are and would like to stick with one if possible.
So far though – that is the only issue I see needing to be addressed. I am very impressed at how you do not feel or hear the iBooster in action. I have driven newer Toyotas with electrically assisted boosters and you can feel the brake pedal vibrating when the motor is running. I have heard aftermarket electrical vacuum pumps and they sound terrible. This booster is nothing like that – it silently does its job. I am also impressed at how well it works having only a travel sensor integrated into the iBooster itself. The only reference the iBooster has to determine how much and when to boost is how much you have pushed the brake pedal in, but it does not feel like that. You don’t feel a hard pedal and then suddenly it gets easier – it feels like you’re pushing a light pedal from the beginning.
I will continue to update this post as I develop more around this solution – thanks for getting this far and hopefully this has been an interesting journey for you as it has been for me!